Windows XP instructions (tougher on Vista!)
1. Download and install ImageMagick (Google it to find it on web).
2. After installation, automatically connect this new program to the right-click menu for your typical image files by: Open Windows Explorer and choose Tools->Folder Options
h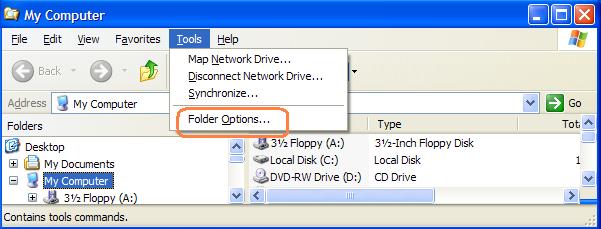
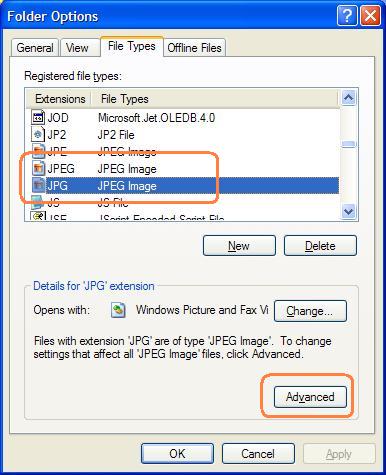
3. Choose File Types tab, then for each file type/extension either add (if it doesn’t exist) or modify (Advanced button) (I did two .JPG and .JPEG)
4. Click ‘New…’ for actions, add new action for example “size1024x768med” – a good size for email.
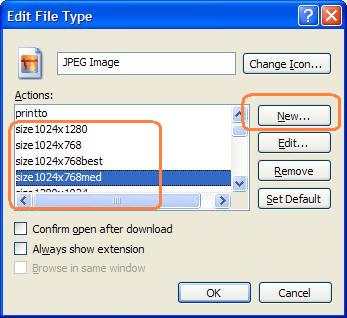
5. For Application used to perform action:, enter the full path of where ImageMagick was installed plus options such as the following:
“C:\Program Files\ImageMagick-6.2.1-Q16\mogrify.exe” -resize 1024×768 -quality 75 “%1”

6. For resizing portrait pictures, add another action such as “size768x1024med”:
“C:\Program Files\ImageMagick-6.2.1-Q16\mogrify.exe” -resize 768×1024 -quality 75 “%1”
7. Add more actions/sizes/options as you need smaller or bigger pictures, different qualities etc.
8. To use this feature, MAKE A COPY of the photo you wish to resize.
9. Repeat, NEVER USE THIS command on the original and only copy, this will modify the file.
10. On the extra copy of the image, right click and choose the action you created, size you want. In this example a number of photos are copied into a new directory called ‘med’ for medium resized photos, and right-click on one or more photos and select the size:
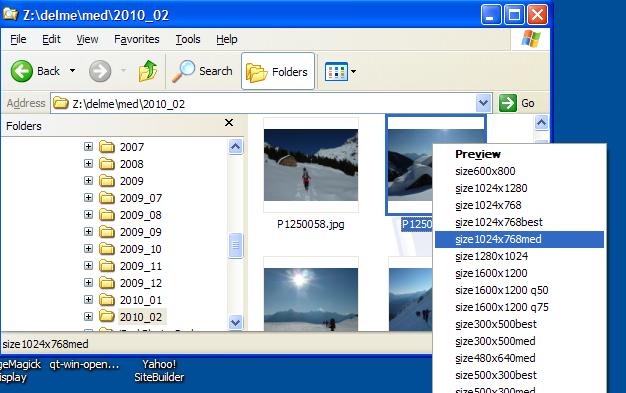
11. Voila the photo is instantly and quickly resized, now you can include it in your email/attachment.